Construction
A Step-by-Step Timeline for Building Your Dream Home: What to Expect in 12 Months

Dec
If you’re thinking, “I want to build a house on my land—where do I start?”, then this timeline for building guide is for you! Constructing a home is an exciting yet intricate process that requires careful planning and coordination. By following this step-by-step timeline for building a house, you’ll know exactly what to expect during the next 12 months. Whether you’re curious about the new home construction timeline after drywall or the house construction step-by-step process, we’ve got you covered.
Months 1-2: Planning and Preparation
The first two months of your house building timeline are crucial. This phase lays the foundation for a successful project and ensures you are well-prepared for the journey ahead. Let’s break down this phase in detail, covering each step of the planning and preparation process.
1. Define Your Vision
If you’re asking, “I want to build a house on my land; where do I start?”, the first step is to envision your dream home. This includes:
- Deciding on the architectural style (modern, traditional, minimalist, etc.).
- Identifying the number of rooms, bathrooms, and other features.
- Considering future needs, such as a home office, guest space, or additional storage.
Create a wish list of your must-haves versus nice-to-haves. This clarity will guide your discussions with architects and contractors.
2. Establish Your Budget
Building your dream home requires careful financial planning. Identify how much you’re willing to spend, keeping in mind costs for:
- Land acquisition (if applicable).
- Construction materials.
- Labor.
- Permits and fees.
- Utilities and landscaping.
Add a contingency fund of 10-20% for unexpected expenses. This financial clarity helps you align your dream with realistic goals.
3. Assemble Your Team of Professionals
A reliable and experienced team is vital to navigate the house construction step-by-step process. Your team may include:
- Architects to design the home according to your vision and local building codes.
- Structural Engineers to ensure the design is safe and sound.
- Contractors to manage construction and oversee day-to-day progress.
- Project Managers to coordinate schedules, budgets, and communication among all parties.
Take time to interview candidates, check references, and review their past projects to ensure they align with your goals.
4. Secure Financing
Unless you’re paying cash, securing financing is a critical early step. Work with your bank or lender to explore options such as:
- Construction loans.
- Mortgages for new builds.
- Home equity loans (if you already own property).
Ensure you have pre-approval before proceeding, as this can influence design and material choices.
5. Choose and Prepare Your Land
If you already own land, you’re ahead in the process. If not, this is the time to find the perfect plot. Key considerations include:
- Proximity to amenities such as schools, hospitals, and shopping centers.
- Accessibility to utilities like water, electricity, and sewage.
- Local zoning regulations and restrictions.
Once the land is secured, conduct soil testing and a site survey to ensure it’s suitable for construction.
6. Obtain Permits and Approvals
One of the most time-consuming steps in the step-by-step process of building construction is acquiring permits. Your team will help you apply for:
- Building permits from local authorities.
- Zoning approvals to confirm compliance with land-use regulations.
- Environmental clearances if your project impacts natural habitats.
Start this process early, as approvals can take weeks or even months depending on your location.
7. Develop a Preliminary Construction Timeline
Collaborate with your contractor and project manager to outline a preliminary house building timeline. This schedule will:
- Break the project into phases, such as site preparation, foundation, framing, and finishing.
- Highlight milestones to track progress.
- Ensure resources and labor are allocated effectively.
Having a clear step-by-step timeline for building a house ensures everyone involved understands expectations.
8. Start Designing
Although full design finalization happens later, this is the stage to begin preliminary sketches and layouts. Discuss your ideas with your architect and consider:
- Floor plans that maximize space and functionality.
- Orientation for natural light and ventilation.
- Structural elements to complement your vision and budget.

Why Planning Matters
The planning and preparation phase forms the backbone of your new home construction timeline. By investing time and effort now, you’ll avoid costly delays and surprises down the road. With your vision clear, your team ready, and your permits in hand, you’re well on your way to making your dream home a reality.
For expert assistance in planning your dream home, contact Nyolenju Structures Limited. We’re here to guide you through every step of the process.
Months 3-4: Design and Final Preparations
Once the initial groundwork is complete, the next two months focus on refining your ideas and preparing for construction. This phase is where your vision begins to take shape on paper, ensuring that every detail aligns with your budget, needs, and preferences. Let’s explore each step in this part of the house building timeline.
1. Finalize the Design
The design phase is critical in the house construction step-by-step process. During this period, you’ll work closely with your architect to develop detailed plans for your new home. This includes:
- Floor Plans: Determine the layout of each room, paying attention to flow, functionality, and aesthetics.
- Elevations and Sections: Review drawings that showcase how the house will look from the outside and inside.
- Structural Details: Ensure the design adheres to engineering requirements for stability and safety.
Collaborate with your architect to incorporate feedback and make necessary adjustments. The finalized design will be the blueprint for the entire construction process.
2. Plan Utilities and Systems
A key aspect of this step in the new home construction timeline is integrating essential systems into your design. This includes:
- Plumbing: Decide on the placement of bathrooms, kitchens, laundry areas, and outdoor water access points.
- Electrical Systems: Map out electrical outlets, light switches, and any specialized wiring for smart home features.
- HVAC: Plan the placement of heating, ventilation, and air conditioning systems to maximize efficiency.
- Waste Management: Ensure the design incorporates a septic system or connection to municipal sewage.
These systems need to be carefully coordinated to avoid conflicts during construction.
3. Choose Materials and Finishes
The materials you select play a significant role in both the aesthetics and durability of your home. Work with your contractor and interior designer (if applicable) to choose materials for:
- Foundation: Reinforced concrete or other durable options.
- Walls and Roofing: Brick, stone, metal, or wood for exterior elements, and shingles, tiles, or sheets for roofing.
- Windows and Doors: Energy-efficient glass and sturdy frames that complement your design.
- Interior Finishes: Flooring, paint colors, countertops, cabinetry, and other decorative elements.
Selecting materials during this stage ensures you’re prepared when construction begins and helps maintain your timeline for building a house.
4. Finalize the Construction Schedule
Collaborate with your contractor to solidify a step-by-step timeline for building your house. This schedule should outline:
- Major milestones, such as completing the foundation, framing, and interior work.
- Estimated timelines for each phase of construction.
- Contingency plans for delays due to weather, material shortages, or unforeseen issues.
A clear construction schedule ensures everyone involved knows what to expect, reducing the risk of miscommunication.
5. Confirm Permits and Approvals
By this stage, your initial permits should be in place, but some additional approvals may still be required, especially if you’ve made design changes. Double-check with your contractor and local authorities to confirm:
- All building permits are current and accurate.
- Any necessary environmental or zoning clearances have been obtained.
This ensures you’re fully compliant before breaking ground.
6. Prepare the Site for Construction
Although the bulk of site preparation occurs during the next phase, some preliminary work may begin during this period, such as:
- Marking the boundaries of the house on the site.
- Identifying and marking utility lines for safe excavation.
- Clearing additional debris or vegetation if necessary.
These steps streamline the transition to the construction phase.
7. Review and Approve the Budget
Before construction begins, it’s important to review the final budget based on your design choices and material selections. This includes:
- Itemized costs for labor, materials, and permits.
- Allowances for unexpected expenses.
- Payment schedules and terms with your contractor.
Ensuring financial clarity during this phase helps avoid surprises later in your house building timeline.
8. Communicate Your Vision
The success of your project depends on clear communication. Use this time to:
- Meet with your construction team to discuss expectations and clarify any questions.
- Confirm timelines, milestones, and responsibilities.
- Ensure everyone understands your vision and goals for the home.
Why This Phase is Crucial
The design and preparation stage is the backbone of your house construction step-by-step process. A well-thought-out design ensures your home is functional, beautiful, and aligned with your budget. Proper preparation minimizes the risk of costly delays or changes during construction.
By the end of this phase, you’ll have a complete new home construction timeline, finalized designs, and a prepared site, ready to bring your dream home to life.
For expert guidance through every step of your building journey, contact Nyolenju Structures Limited. Let us help you create a home that reflects your unique style and needs.
Months 5-8: Construction Phase 1 – Foundation to Frame
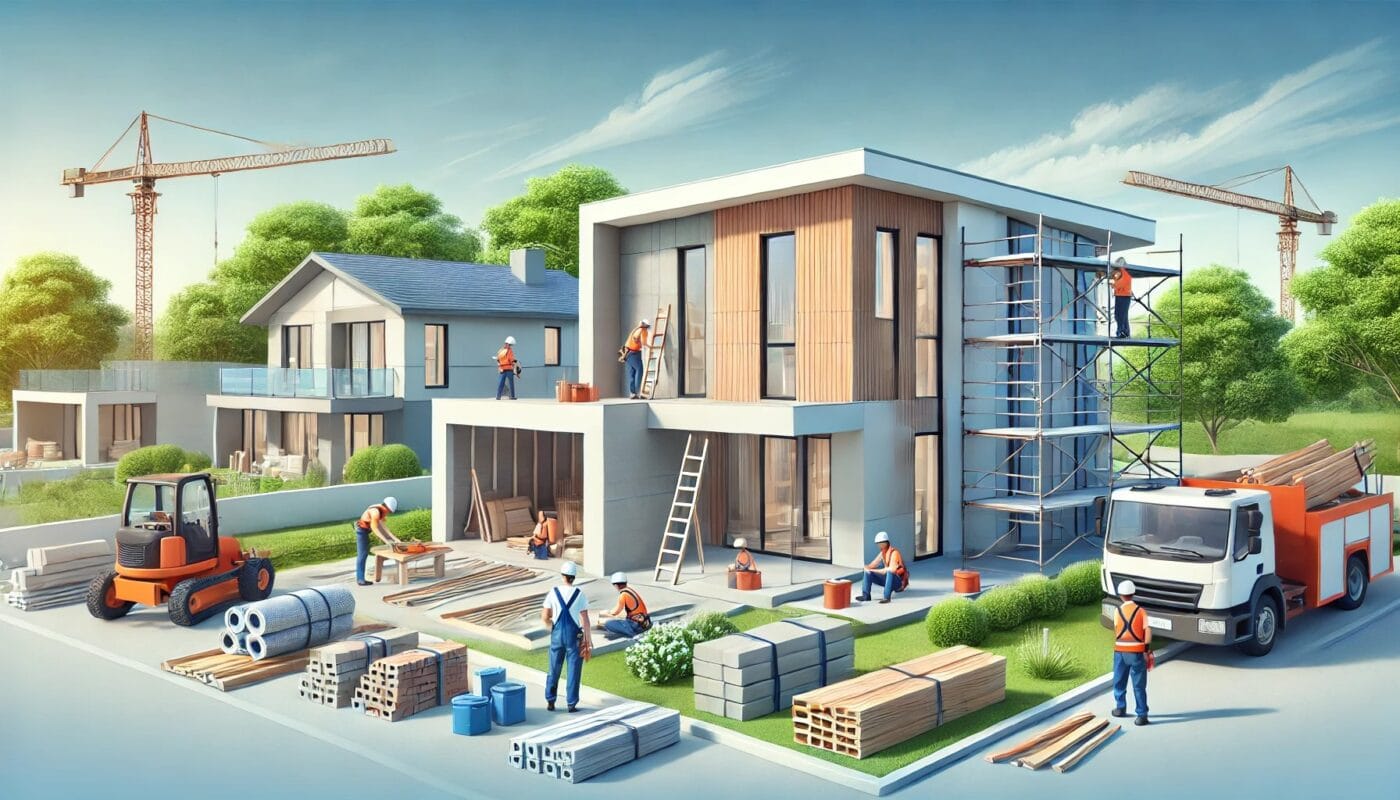
During Months 5-8, the focus shifts from planning to actual construction. This phase is where your vision begins to take physical shape as the foundation is laid, and the structure of your home is built. It’s one of the most exciting parts of the house construction step-by-step process because you’ll see tangible progress on your new home. Let’s break it down step by step.
1. Site Preparation
Before construction begins, the land must be prepared to support your home. This involves:
- Clearing and Grading: Removing vegetation, rocks, and debris from the site. The land is leveled to ensure a stable base for construction.
- Setting Up Utilities: Temporary power, water, and sanitation facilities are established to support construction activities.
- Marking the Layout: The site is marked with stakes and strings to outline the footprint of the house based on the approved design.
This preparatory work ensures the site is ready for the next stages of the new home construction timeline.
2. Laying the Foundation
The foundation is one of the most critical steps in the house building timeline, as it provides the structural stability for your home. This process includes:
- Excavation: Digging trenches or holes based on the foundation design (e.g., slab, crawl space, or basement).
- Formwork: Wooden or metal forms are set up to shape the concrete.
- Pouring Concrete: Concrete is poured into the forms and allowed to cure. Reinforcement such as steel bars (rebar) is added for extra strength.
- Foundation Inspection: Before proceeding, the foundation is inspected to ensure it meets safety and building codes.
Once the foundation is complete, the house construction step-by-step process moves to the framing phase.
3. Framing the Structure
Framing is the stage where your house’s skeleton is built. It includes:
- Floor Framing: Installing joists, beams, and subflooring to create the base of your home.
- Wall Framing: Vertical studs are erected, forming the walls of your home. Openings for windows and doors are included at this stage.
- Roof Framing: Rafters or trusses are added to create the roof structure.
Framing transforms your blueprint into a tangible structure, giving you the first glimpse of your home’s size and layout.
4. Sheathing and Weatherproofing
To protect the framed structure from weather elements, the next steps are:
- Wall Sheathing: Wooden or OSB (oriented strand board) panels are attached to the frame to create a solid outer surface.
- Roof Sheathing: Similar panels are added to the roof.
- Weather Barriers: A waterproof house wrap is applied to the exterior walls to prevent moisture intrusion while allowing the structure to breathe.
This stage is vital for maintaining the durability and longevity of your home.
5. Utility Installation Preparations
Although utility systems are primarily installed in later stages, preparations may begin during this phase, including:
- Pre-installing conduits or pathways for electrical wiring and plumbing.
- Mapping HVAC duct locations to ensure smooth installation later.
These steps are coordinated to ensure the construction stays aligned with the new home construction timeline.
6. Initial Inspections
Building inspectors will visit the site during this phase to review:
- Foundation integrity and anchoring.
- Framing quality and alignment with approved plans.
Inspections are crucial to ensure compliance with local building codes and standards. Passing these inspections allows the construction process to move forward without delays.
Challenges During This Phase
While progress is exciting, this stage often comes with challenges, such as:
- Weather Delays: Rain or extreme weather can slow down foundation curing or framing work.
- Material Shortages: Delays in delivery of lumber, concrete, or other materials can impact the timeline.
- Unexpected Site Issues: Poor soil conditions or underground obstacles may require additional preparation work.
A well-coordinated team can mitigate these challenges, keeping your project on track.
The foundation and framing phase is essential because it determines the structural stability and overall durability of your home. It also provides the framework for all subsequent construction phases, such as systems installation and interior finishing.
What’s Next?
With the foundation and framing complete, the project will transition to the next phase: installing utilities, enclosing the structure, and adding insulation and drywall. This sets the stage for creating functional and livable spaces.
For professional construction services and project management, trust Nyolenju Structures Limited to guide you through every step of your new home construction timeline. Let’s build your dream home together!
Months 9-10: Construction Phase 2 – Systems and Enclosure
Months 9-10 mark a significant stage in the house construction step-by-step process. During this phase, the internal systems that make a house functional—such as plumbing, electrical, and HVAC—are installed. Additionally, the structure is enclosed, transforming it into a weatherproof and secure environment. This is where the skeleton of your house starts becoming a livable space.
1. Installing Plumbing Systems
The plumbing system installation lays the groundwork for water supply, drainage, and waste management. This step includes:
- Water Lines: Installing pipes for hot and cold water supply throughout the house.
- Drainage Systems: Setting up waste pipes for bathrooms, kitchens, and laundry areas.
- Sewage Connections: If applicable, connecting your home to municipal sewage or septic systems.
- Fixture Rough-Ins: Preparing spaces for sinks, bathtubs, showers, and toilets.
Plumbing is coordinated with other systems to avoid interference during later stages.
2. Electrical Wiring Installation
An essential part of your new home construction timeline, electrical installation ensures your home has power where it’s needed. This includes:
- Outlet and Switch Placement: Running wiring to power outlets, switches, and appliances.
- Lighting Systems: Prepping wiring for ceiling lights, chandeliers, and exterior lighting.
- Special Systems: Installing circuits for smart home devices, security systems, and backup generators.
- Main Electrical Panel: Setting up the electrical panel that distributes power throughout your home.
At this stage, all wiring is placed inside the walls but remains exposed for inspection before drywall installation.
3. HVAC System Installation
Heating, ventilation, and air conditioning (HVAC) systems are essential for climate control and air quality. HVAC installation involves:
- Ductwork Installation: Running ducts for air circulation in each room.
- Vent Placement: Adding vents for heating and cooling systems.
- System Setup: Installing central heating units, air conditioning systems, or other HVAC components.
Proper HVAC installation ensures energy efficiency and year-round comfort in your home.
4. Roofing Completion
The roof, which was framed earlier, is now completed with the addition of materials such as:
- Shingles: Asphalt, wood, metal, or tile shingles are installed for durability and style.
- Flashing: Metal strips are added around chimneys, vents, and joints to prevent water leaks.
- Gutters and Downspouts: These are installed to manage water runoff and protect your foundation.
Completing the roof fully encloses your home, shielding it from the elements.
5. Windows and Doors Installation
The installation of windows and doors is another significant step in the house building timeline. This includes:
- Windows: Installing energy-efficient glass windows to provide natural light and insulation.
- Exterior Doors: Adding front, back, and patio doors for security and accessibility.
With windows and doors in place, your home becomes weather-tight, allowing work to continue inside regardless of external conditions.
6. Insulation Installation
Insulation is crucial for energy efficiency and comfort. During this stage:
- Wall Insulation: Fiberglass, foam, or cellulose insulation is added between wall studs to regulate indoor temperature.
- Roof Insulation: The attic or roof space is insulated to prevent heat loss.
- Floor Insulation: In some cases, insulation is added beneath floors to enhance thermal performance.
Insulation helps reduce energy costs and improves the overall livability of your home.
7. Drywall Installation
Drywall marks a transformative stage in the new home construction timeline after drywall. The walls and ceilings are installed, giving your home its final interior structure. This step involves:
- Hanging Drywall Sheets: Sheets are attached to wall studs and ceilings.
- Taping and Mudding: Joints between drywall sheets are taped and covered with a joint compound for a seamless finish.
- Sanding: Once the compound dries, the walls are sanded smooth, ready for paint or texture.
Drywall installation creates the foundation for interior finishes like paint, wallpaper, or tiles.
8. Initial Inspections and Tests
Before moving to the next phase, inspections are conducted to ensure all systems are properly installed and meet code requirements. These include:
- Plumbing Inspection: Ensures all pipes are leak-free and functional.
- Electrical Inspection: Confirms wiring safety and compliance.
- HVAC Inspection: Verifies that heating and cooling systems are correctly installed.
Addressing any issues at this stage prevents costly rework later.
Challenges During This Phase
While this phase brings significant progress, potential challenges include:
- Scheduling Conflicts: Coordinating multiple subcontractors (plumbers, electricians, HVAC technicians) can be complex.
- Material Delays: Delays in delivery of systems or insulation can slow down the timeline.
- Weather Impacts: While the house is enclosed, external work like roofing may still be affected by weather.
A well-organized project manager ensures these challenges are minimized.
Why This Phase is Important
This phase transitions your home from a bare structure to a functional, livable space. Proper installation of systems and enclosing the house ensures comfort, safety, and energy efficiency for years to come.
What’s Next?
With systems installed and the house enclosed, the project moves into the final stages of construction. Months 11-12 will focus on interior finishes, landscaping, and final inspections, bringing your dream home to completion.
For expert guidance on every step of your house building timeline, contact Nyolenju Structures Limited. We’ll ensure your home is built to the highest standards, delivering comfort and quality for years to come.
Month 11: Interior Finishing
By Month 11, your home’s structure is complete, and the focus shifts to creating a beautiful, functional interior. Interior finishing is one of the most exciting stages in the house construction step-by-step process because it involves transforming raw spaces into rooms that reflect your personal style and needs. Here’s a detailed breakdown of what happens during this phase.
1. Painting and Wall Finishes
After drywall installation, the walls and ceilings are ready for finishing. This step includes:
- Priming and Painting: Applying a primer coat followed by your chosen paint colors for walls and ceilings. Neutral colors are common for versatility, but bold accents can add character.
- Texturing (Optional): Some homeowners opt for textured walls or ceilings for a unique aesthetic.
- Wallpaper Installation: If desired, wallpaper can be applied to accent walls or specific rooms for a stylish touch.
This stage sets the tone for the overall interior design of your home.
2. Flooring Installation
Flooring ties together the aesthetic of your home and needs to be both durable and stylish. Common options include:
- Tile: Ideal for kitchens, bathrooms, and entryways due to its durability and water resistance.
- Hardwood or Laminate: Popular in living areas and bedrooms for their warmth and elegance.
- Carpet: Provides comfort and sound insulation, especially in bedrooms or family rooms.
- Vinyl or Engineered Flooring: A budget-friendly option that mimics the look of wood or stone.
Each flooring type is installed according to room functionality and your personal preference.
3. Cabinetry and Woodwork
Custom cabinetry and woodwork elevate the functionality and design of your home. This stage includes:
- Kitchen Cabinets: Installing base and wall-mounted cabinets, as well as islands or pantries, for storage and utility.
- Bathroom Vanities: Adding vanities with countertops, sinks, and storage.
- Closet Systems: Custom shelves, rods, and drawers in closets for organization.
- Trim and Molding: Baseboards, crown molding, and window or door casings are installed for a polished look.
These elements add both practicality and elegance to your home.
4. Lighting Fixtures and Electrical Finishes
Once electrical wiring is completed, it’s time to install fixtures and appliances, including:
- Ceiling Lights and Chandeliers: For ambient lighting in rooms.
- Recessed Lighting: For a modern, minimalist look.
- Pendant and Task Lighting: Ideal for kitchens, offices, or reading nooks.
- Switch Plates and Outlets: Ensuring all electrical outlets and switches are securely installed and functional.
Lighting transforms your home’s ambiance and highlights architectural details.
5. Bathroom and Kitchen Fixtures
The bathrooms and kitchen are equipped with functional and aesthetic fixtures, including:
- Sinks and Faucets: Installed in kitchens, bathrooms, and laundry areas.
- Bathtubs and Showers: Plumbing is connected, and enclosures or curtains are added as needed.
- Toilets: Installed and tested for proper functionality.
- Appliances: Dishwashers, ovens, refrigerators, and microwaves are installed in the kitchen.
This step ensures your home is fully equipped for everyday living.
6. Interior Doors and Hardware
Interior doors are installed, providing privacy and defining spaces. This includes:
- Bedroom, Bathroom, and Closet Doors: Hung with hinges and fitted with doorknobs or handles.
- Pocket or Sliding Doors: For spaces where swing doors are impractical.
- Door Hardware: Adding locks, knobs, or levers that complement your home’s design.
Properly installed doors contribute to the functionality and aesthetic of your home.
7. Final Touches and Accessories
The final touches bring your home to life. This stage includes:
- Decorative Elements: Adding wall art, shelving, or custom design features.
- Blinds and Curtains: Window treatments for privacy and style.
- Mirrors and Fixtures: Placing mirrors in bathrooms and decorative fixtures throughout the home.
These details personalize your space and make it feel like home.
8. Final Cleaning
Before moving in, the home undergoes a thorough cleaning to remove construction dust and debris. This includes:
- Polishing floors and windows.
- Cleaning fixtures and appliances.
- Wiping down walls, trim, and surfaces.
A spotless home ensures a fresh start when you take occupancy.
Why Interior Finishing Matters
Interior finishing is essential because it defines the comfort, functionality, and aesthetics of your home. This phase is where your personal style is reflected in every room, and careful attention to detail ensures a polished result.
What’s Next?
After interior finishing, your home is almost ready for move-in. The final phase—Month 12—focuses on landscaping, final inspections, and handing over the keys to your dream home.
For expert guidance and flawless execution, trust Nyolenju Structures Limited to make your dream home a reality. We ensure every detail meets your expectations and delivers unmatched quality.
Month 12: Final Touches and Move-In
The final month of your house construction step-by-step process is perhaps the most exciting and satisfying. After months of planning, hard work, and collaboration, your dream home is almost ready for you to move in. During Month 12, the focus is on the finishing touches, thorough inspections, and preparing the house for occupancy. Here’s what happens in this final phase of the house building timeline.
1. Landscaping and Exterior Finishing
The exterior of your home gets the final polish during this stage. This involves:
- Landscaping: Planting grass, shrubs, flowers, and trees to enhance your property’s curb appeal. Creating pathways, patios, or outdoor seating areas is also common.
- Driveways and Walkways: Paving or finishing driveways and walkways for accessibility and functionality.
- Fencing and Gates: Adding privacy fences, decorative gates, or boundary markers to complete the property.
- Exterior Cleaning: Pressure washing the façade, windows, and hardscaped areas to give the home a pristine appearance.
A well-designed exterior makes your home more inviting and adds long-term value.
2. Interior Detailing
Interior detailing ensures every corner of your home looks and feels perfect. Key tasks include:
- Touch-Up Painting: Addressing any minor scuffs or imperfections on walls and trim.
- Polishing Surfaces: Cleaning and shining countertops, cabinets, and flooring to a high standard.
- Appliance Testing: Double-checking the functionality of installed appliances like ovens, dishwashers, and HVAC systems.
- Furnace and HVAC Calibration: Ensuring the heating and cooling systems are working efficiently.
Attention to detail in this stage guarantees that your home meets the highest standards of quality and livability.
3. Final Inspections and Certifications
Your home undergoes rigorous inspections to ensure it’s ready for occupancy. These inspections include:
- Building Code Compliance: Verifying that the construction meets all local building regulations.
- Systems Testing: Confirming that plumbing, electrical, and HVAC systems are safe and operational.
- Safety Features: Ensuring smoke detectors, carbon monoxide alarms, and fire extinguishers are installed and functional.
Once the inspections are completed, you’ll receive an occupancy certificate, allowing you to legally move into your new home.
4. Cleaning and Staging
Before you officially move in, a final cleaning is conducted to remove construction dust and leave the house spotless. This includes:
- Vacuuming and mopping floors.
- Cleaning windows, mirrors, and fixtures.
- Sanitizing bathrooms and kitchen spaces.
Some homeowners choose to stage their home with furniture and décor to see how the spaces work together before fully moving in.
5. Walkthrough and Punch List Completion
A walkthrough with your contractor is essential in this phase to ensure that all work has been completed to your satisfaction. During the walkthrough:
- Create a Punch List: Note any outstanding tasks, such as touch-ups or adjustments, and ensure they’re addressed promptly.
- Verify Systems and Features: Test doors, windows, locks, faucets, and lighting to confirm they’re fully operational.
This step allows you to address any concerns before officially taking ownership of your home.
6. Moving In
Once the inspections and walkthroughs are complete, it’s time to move in! Here’s how to make the process seamless:
- Coordinate Movers: Schedule a professional moving service or plan your move to transport furniture and belongings.
- Set Up Utilities: Ensure electricity, water, internet, and other essential services are activated.
- Decorate Your Space: Personalize your new home with furniture, art, and accessories that reflect your style.
Moving into your home is the culmination of months of hard work, so take time to celebrate this milestone.
Why This Phase is Important
The final touches and move-in phase is critical because it marks the transition from construction to a fully functional, livable space. Proper execution ensures that your home is safe, comfortable, and perfectly suited to your needs.
Key Tips for a Smooth Move-In
- Document Everything: Keep a record of warranties, permits, and inspections for future reference.
- Create a Maintenance Plan: Schedule regular upkeep for your HVAC system, plumbing, and landscaping to keep your home in top shape.
- Celebrate Your Achievement: Hosting a housewarming party is a wonderful way to share your new space with family and friends.
Congratulations on Your New Home!
After 12 months of planning, design, and construction, your dream home is finally complete. At Nyolenju Structures Limited, we’re proud to be part of your journey, delivering a house that meets your expectations and exceeds industry standards.
Are you ready to start your own house building timeline? Contact us today to turn your vision into reality. Let’s build your dream home together!
What Are the 5 Stages of Building a House?
- Foundation: Clearing the land and laying the groundwork.
- Framing: Constructing the skeleton of the home.
- Systems Installation: Adding plumbing, electrical, and HVAC.
- Interior and Exterior Finishing: Drywall, paint, and fixtures.
- Final Touches: Landscaping and inspections.
Conclusion
By following this comprehensive timeline for building a house, you’ll stay informed at every step of the process. Whether it’s preparing your land, planning the design, or understanding the new home construction timeline after drywall, careful preparation ensures your dream becomes a reality.
For expert guidance through the house building timeline, contact Nyolenju Structures Limited today. Let us help you bring your vision to life, one step at a time.